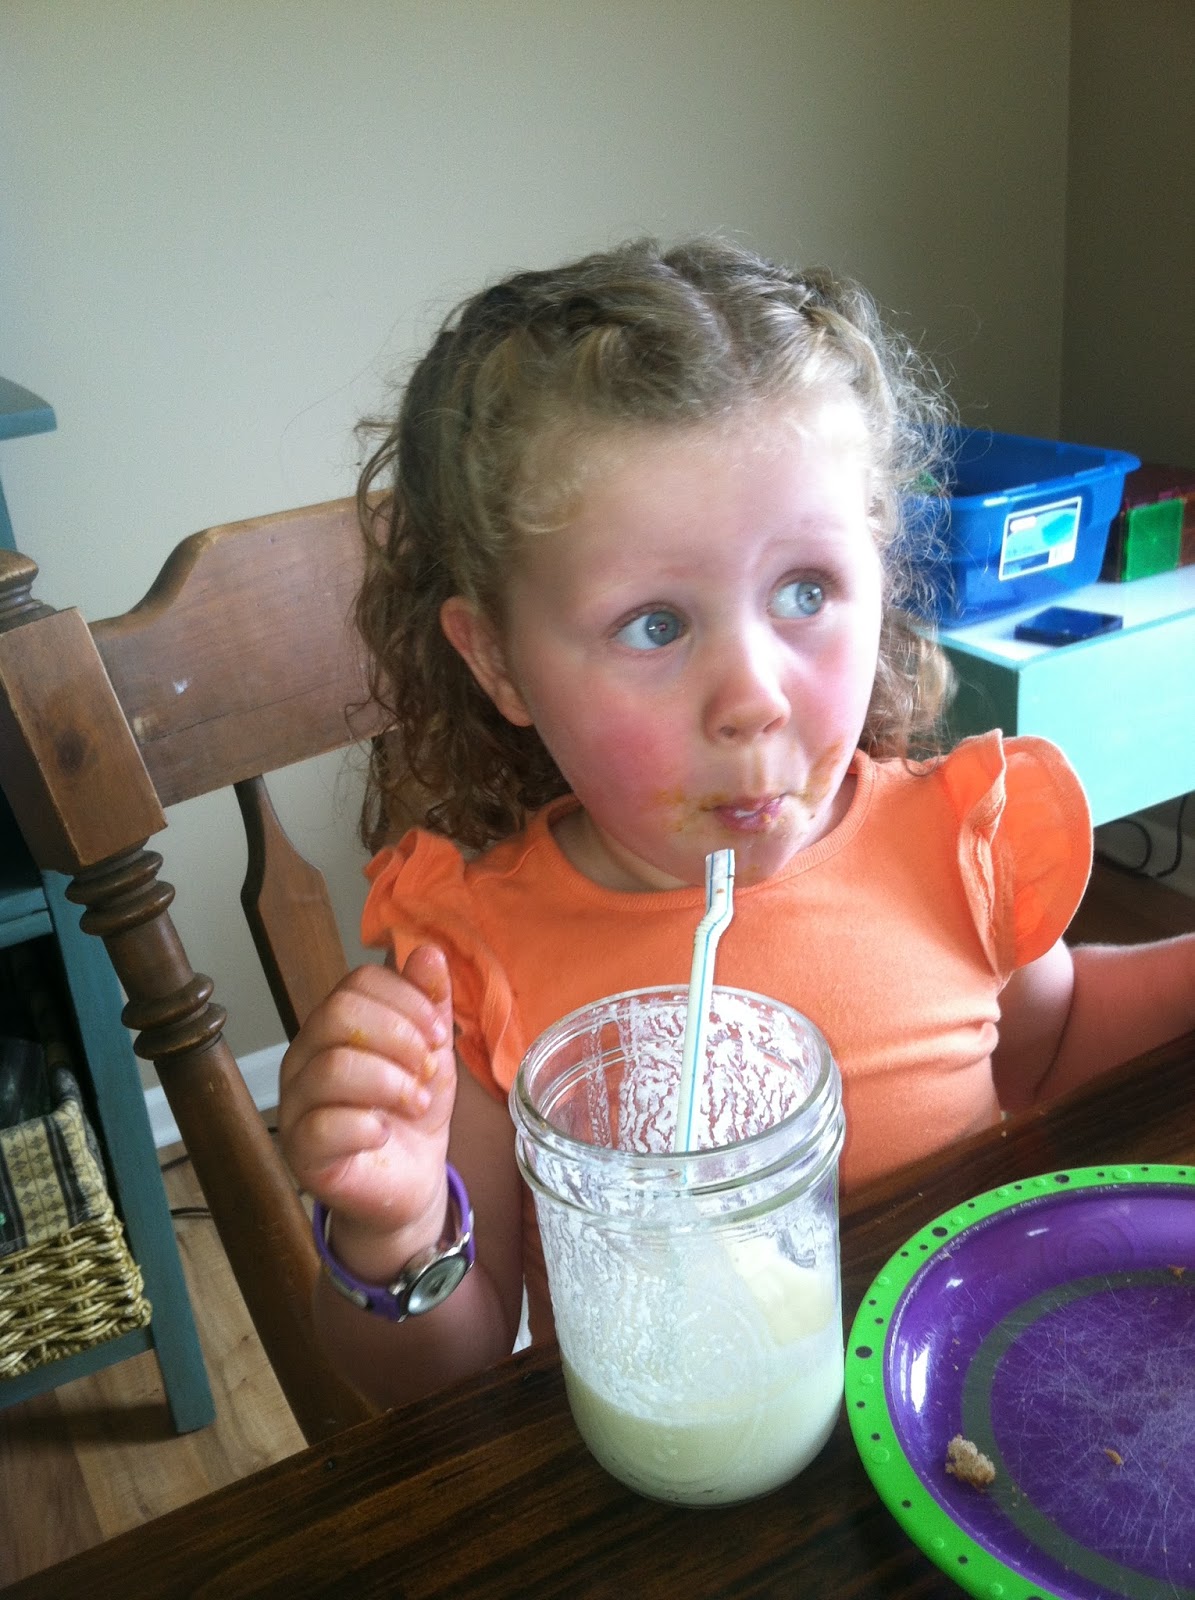
Nutritious, Traditional Food: Homemade Baby Formula Part 1

Originally posted August 2013

I want to do a series on traditionally prepared, nutritious foods.  We have started this journey, as many of you know, in an effort to heal our son’s reflux and gut issues.  Below is a little background on what happened with my now 7 year old (though leaving out a lot of details, not to mention the cost comparison of medicines and formulas vs homemade). 

Obviously, I am in no way a medical professional and am NOT giving you medical or health care advice.  I am offering you information and what you do with it is up to you.  

Mister had terrible reflux, was on Nutramigen baby formula (it is an elemental formula in which the dairy is broken down as much as possible) for dairy protein allergy, and overall his gut was a mess.  I nursed and pumped as long a I could (while doing a dairy free diet myself, for his sake) but Mister refused to nurse after 6 months; I continued to pump but after a month lost my supply.

If you have read anything about traditional foods, or traditional nutrition, you have read that the “gut” is the most vital part of the body- it produces enzymes that affect every single aspect of your body functioning properly, along with so much more we have learned in the last 10 years.

From using hormones to absorbing vitamins and minerals, the condition of your gut determines your overall health.  Period.  (see the bottom of this article for links and resources regarding gut health)

So, here are a list of the ingredients in a can of Nutramigen:
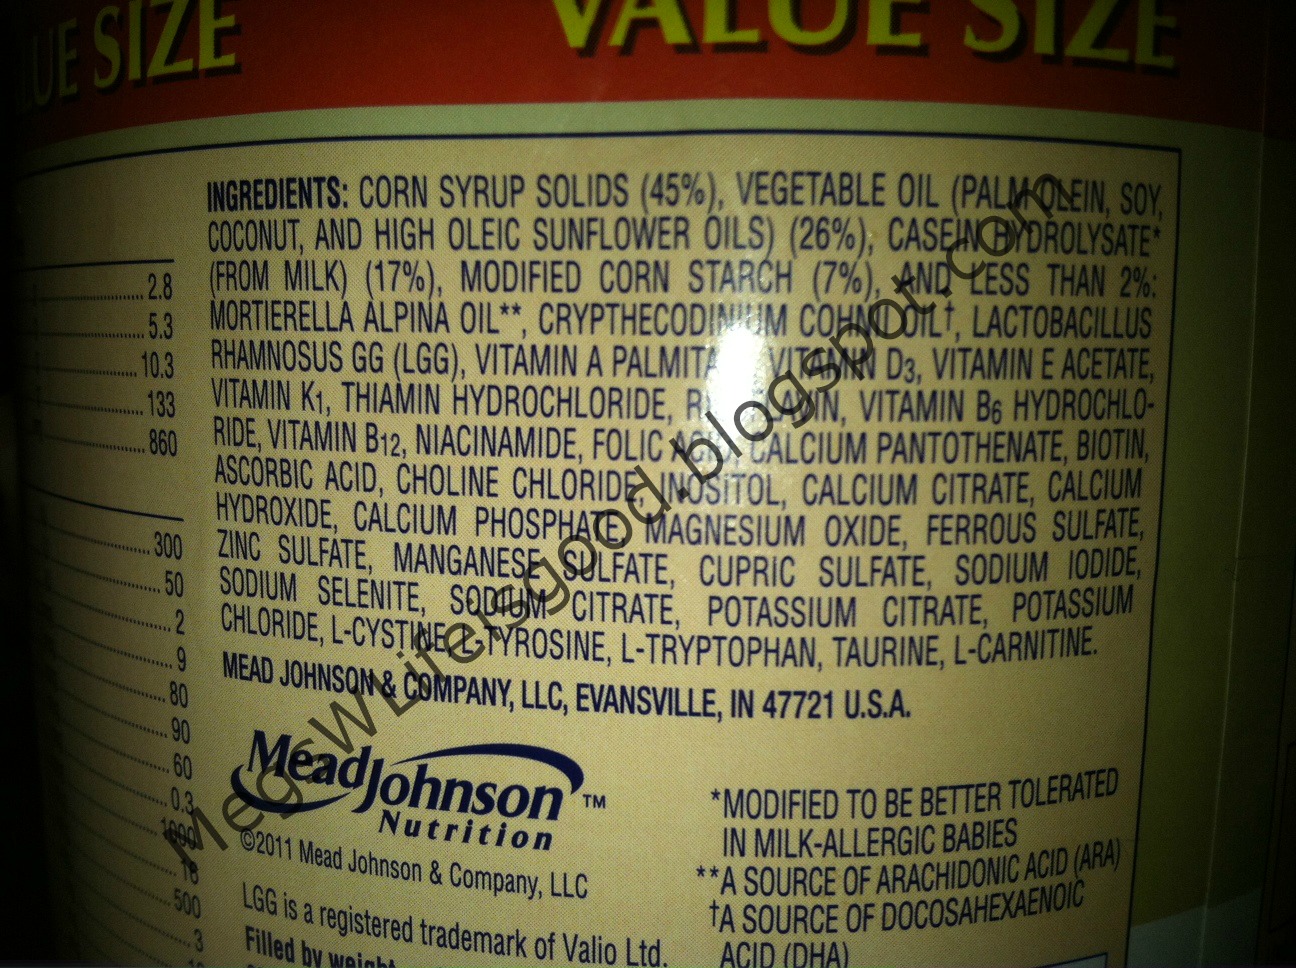
That is a picture taken straight from a can of baby formula in my pantry.  I have no idea why I still have this can.  Maybe it reminds me of how far we have come in just 4 short months.

Can you pronounce any of those words easily?  Do you know what many of those ingredients are?

They aren’t natural.  They are not God made and nature grown.

Ingredients on a package are in order of amount found in that product.  Corn syrup solids are the majority of what is makes up most general baby formulas.

Corn syrups solids are a genetically modified organism (GMO), made from corn and are basically SUGAR.  A crappy, non-nutritional, HIGHLY processed chemical food product.

I can’t even call it a food, because it isn’t.

Corn syrup solids interfere with a hormone which tells your body “hey, you’re full!  Stop eating!”  Therefore you eat more (that’s pretty convenient for food corporations…).

Corn syrup or some form of it is found in almost anything in a package or box.  It is much healthier to find a real food recipe version of your favorite boxed foods and cook them at home.

Check out this link from Dr. Mark Hyman on 5 Reasons Why High Fructose Corn Syrup Will Kill You.

None of those ingredients aid in the health of the gut, body, or absorption of nutrients.  Do babies everywhere survive on that can?  Yes, they do. Do they possibly have unforeseen health complications later in life?  Yes.

Many of those ingredients have been linked to health problems, especially the highly processed High Fructose Corn Syrup, and vegetable oils in that can.  *ick*  I seriously can’t imagine making meals out of that stuff.

So, I did research.  I read.  I bought Nourishing Traditions Cookbook.  FYI- that is a link to the cookbook on Amazon.  

I love it so much I took it to Kinkos and had the covers laminated, and the binding spiral bound so I can lay it flat and it makes it easier to flip through 700 pages.
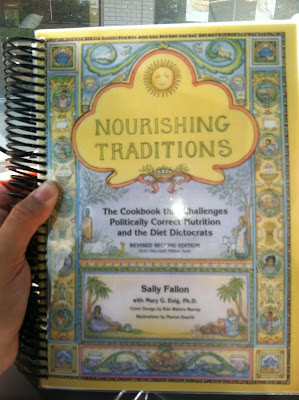
In the Nourishing Traditions cookbook, there are recipes for baby formula (it is also found on Weston A Price website).  One uses raw milk or goats milk, which with a dairy protein allergy Max cannot have. *for baby #4 in 2016, I did make the goat milk formula for our baby and it worked well. We will do it again for Baby #5 if necessary

The other uses liver and bone broth.  *ding ding ding*

So, I went back to searching for organic grassfed beef bones for stock and liver, and all the ingredients I needed for the formula.  After I found them all, we decided to dive in and do it!

I began weaning him onto the meat-based formula the week we left for a trip in June.  I made up a few batches, froze them, and took them with us.  By the time we got home he was on the homemade formula full time, in addition to his solids.

No more nutrient void commercial formula.

A few chiropractor visits later, and Max is no longer on medication.  His gut is healed- thanks to that bone broth and it’s mineral producing gelatin, no doubt.  The chiropractor also did work on his gut, you can read about that here.  (Google the importance on bone broth in your diet). **This was all pre-the big bone broth craze of paleo and keto fads. But doesn’t change the fact that it is affective.

Gosh, it really brings me to tears writing this out.

His belly is healed.  He occasionally spits up, but usually only when I get his bottle too warm, or he gulps it down.

Oddly, after I started Max on the homemade formula, he became a new baby in many ways.  He started napping better, was generally happier, and his development shot off.

He no longer has reflux, and there aren’t acid reflux stains on his bed sheets anymore.  Even on his medicines there were smelly, acidic stains on his sheets after a nap, or first thing in the morning, from refulx.

Traditional, WHOLE foods healed my son’s gut.

Not a medicine that masks symptoms.

Hard work and healthy food.

So, what is this homemade, meat-based baby formula recipe, you may be asking?
From Nourishing Traditions by Sally Fallon, page 603 here it is:

3 3/4 cups homemade beef or chicken broth (recipe from page 122 or 124)
2 ounces organic liver
5 Tablespoon lactose
1 teaspoon infant probiotic
1/4 cup homemade liquid whey
1 Tablespoon organic coconut oil
1 teaspoon codliver oil (I use Green Pastures)
1 teaspoon UNrefined sunflower oil
2 teaspoons extra virgin olive oil
1/4 teaspoon acerola powder

Now, assume all those ingredients are from only the best sources and are organic.  Because anything you can get from Walmart probably isn’t the best quality ingredient. **In 2019, you can actually find a lot of organic foods and ingredients in Walmart and Kroger- yay!

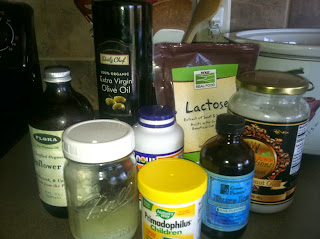
I found mine at: http://www.radiantlifecatalog.com/ and I get my coconut oil from http://www.tropicaltraditions.com/

I use Weston A Price Foundation as a HUGE source of information and health related articles, along with Nourishing Traditions– it is so much more than a cookbook!  It is over 700 pages of wisdom, science, and traditional health information.

The point of this recipe is that all ingredients are natural, whole, raw sources of the vitamins, minerals, and nutrients a baby needs-they can be easily absorbed and the body knows what to do with them.  They are not processed or found in a man made vitamin capsule.  (you can overdose on synthetic vitamins, but it is much harder to do so with natural sources because your body knows how to use them and rid of excess.)

I also want to include the breakdown of the nutritional analysis done by Sally Fallon and Weston A Price Foundation of breastmilk and these homemade formulas.  Obviously breast milk is BEST, provided the mother eats a nutritious diet, but some of us aren’t able to nurse or continue nursing.

This is a good alternative for my family:

Based on 36 ounces.
Breast Milk
Cow’s Milk
Formula
Goat Milk
Formula
Liver-Based
Formula
Calories
766
856
890
682
Protein
11.3g
18g
18g
15g
Carbohydrates
76g
79g
77g
69g
Total Fat
48g
52g
54g
36g
Saturated Fat
22g
28g
30g
16g
Mono Fat
18g
16g
16g
12g
Poly Fat
5.5g
5.6g
5.7g
5.6g
Omega-3 FA
.58g
1.3g
1.2g
1.0g
Omega-6 FA
4.4g
4.2g
4.4g
4.5g
Cholesterol
153mg
137mg
166mg
227mg
Vitamin A*
946IU
5000IU
5000IU
20,000IU
Thiamin-B1
.15mg
1.05mg
1.1mg
.19mg
Riboflavin-B2
.4mg
1.2mg
1.2mg
1.9mg
Niacin-B3
1.9mg
2.5mg
4.4mg
14.2mg
Vitamin B6
.12mg
.51mg
.60mg
.65mg
Vitamin B12
.5mcg
1.9mcg
2.8mcg
39mcg
Folate
57mcg
236mcg
284mcg
159mcg
Vitamin C
55mg
57mg
59mg
62mg
Vitamin D
480IU
450IU
525IU
460IU
Vitamin E***
9.9mg
6.2mg
4.7mg
4.9mg
Calcium
355mg
532mg
548mg
NA**
Copper
.57mg
.38mg
.58mg
1.9mg
Iron
.33mg
1.4mg
2.2mg
5.4mg
Magnesium
37.4mg
91.3mg
96.1mg
34.5mg
Manganese
.29mg
.034mg
.12mg
.24mg
Phosphorus
151mg
616mg
729mg
344mg
Potassium
560mg
949mg
1228mg
750mg
Selenium
18.8mcg
15.4mcg
18.7mcg
31.1mcg
Sodium
186mg
308mg
320mg
NA**
Zinc
1.9mg
2.8mg
2.7mg
2.5mg
* Vitamin A levels in human milk will depend on the diet of the mother. Nursing mothers eating vitamin A-rich foods such as cod liver oil will have much higher levels of vitamin A in their milk. Commercial formulas contain about 2400 IU vitamin A per 800 calories.
** Calcium and sodium values for homemade broth are not available.
*** Vitamin E values are derived from commercial vegetable oils. The vitamin E levels for homemade formulaswill be higher if good quality, expeller-expressed oils are used.

At first I was embarrassed and scared to tell people I made Mister’s formula. As in most things, when you go against the grain or do something differently that mainstream society, people think you’re a little wacky. In 2019, it can be easier for people to see the benefits of real, nutritious food for all stages of life, than it was even in 2013.

I am proud to say we worked hard, and we healed Max’s gut (and therefore damage caused by the commercial formulas and medicines we had tried).  He is healthy, growing, and gaining weight better than he ever did the first half of his first  year.

We are approaching his first birthday, and I am so thankful.

 READ PART 2 HERE

Articles on gut health:


Nutritious, Traditional Food How To: {Weston A. Price} Homemade Baby Formula Part 2

Originally posted October 2013
A few months back I left you with some information about the homemade, meat based baby formula we make at our home.
(Well, were making. Mister is almost 14 months old now, and we have weaned onto a coconut milk tonic. But I have read where many families used the homemade broth up to 2 years).

So, what is this homemade, meat-based baby formula recipe, you may be asking?

From Nourishing Traditions: The Cookbook that Challenges Politically Correct Nutrition and the Diet Dictocrats by Sally Fallon, page 603 here it is:

***Please see my previous post HERE for LOTS of details on this recipe, and where to find the ingredients.***


Here is my method for making this formula.

  • I first made my bone broth, either chicken in the crock pot, or beef bone broth in a huge stock pot.
  • Then collect all my ingredients and get out my measuring spoons for each.


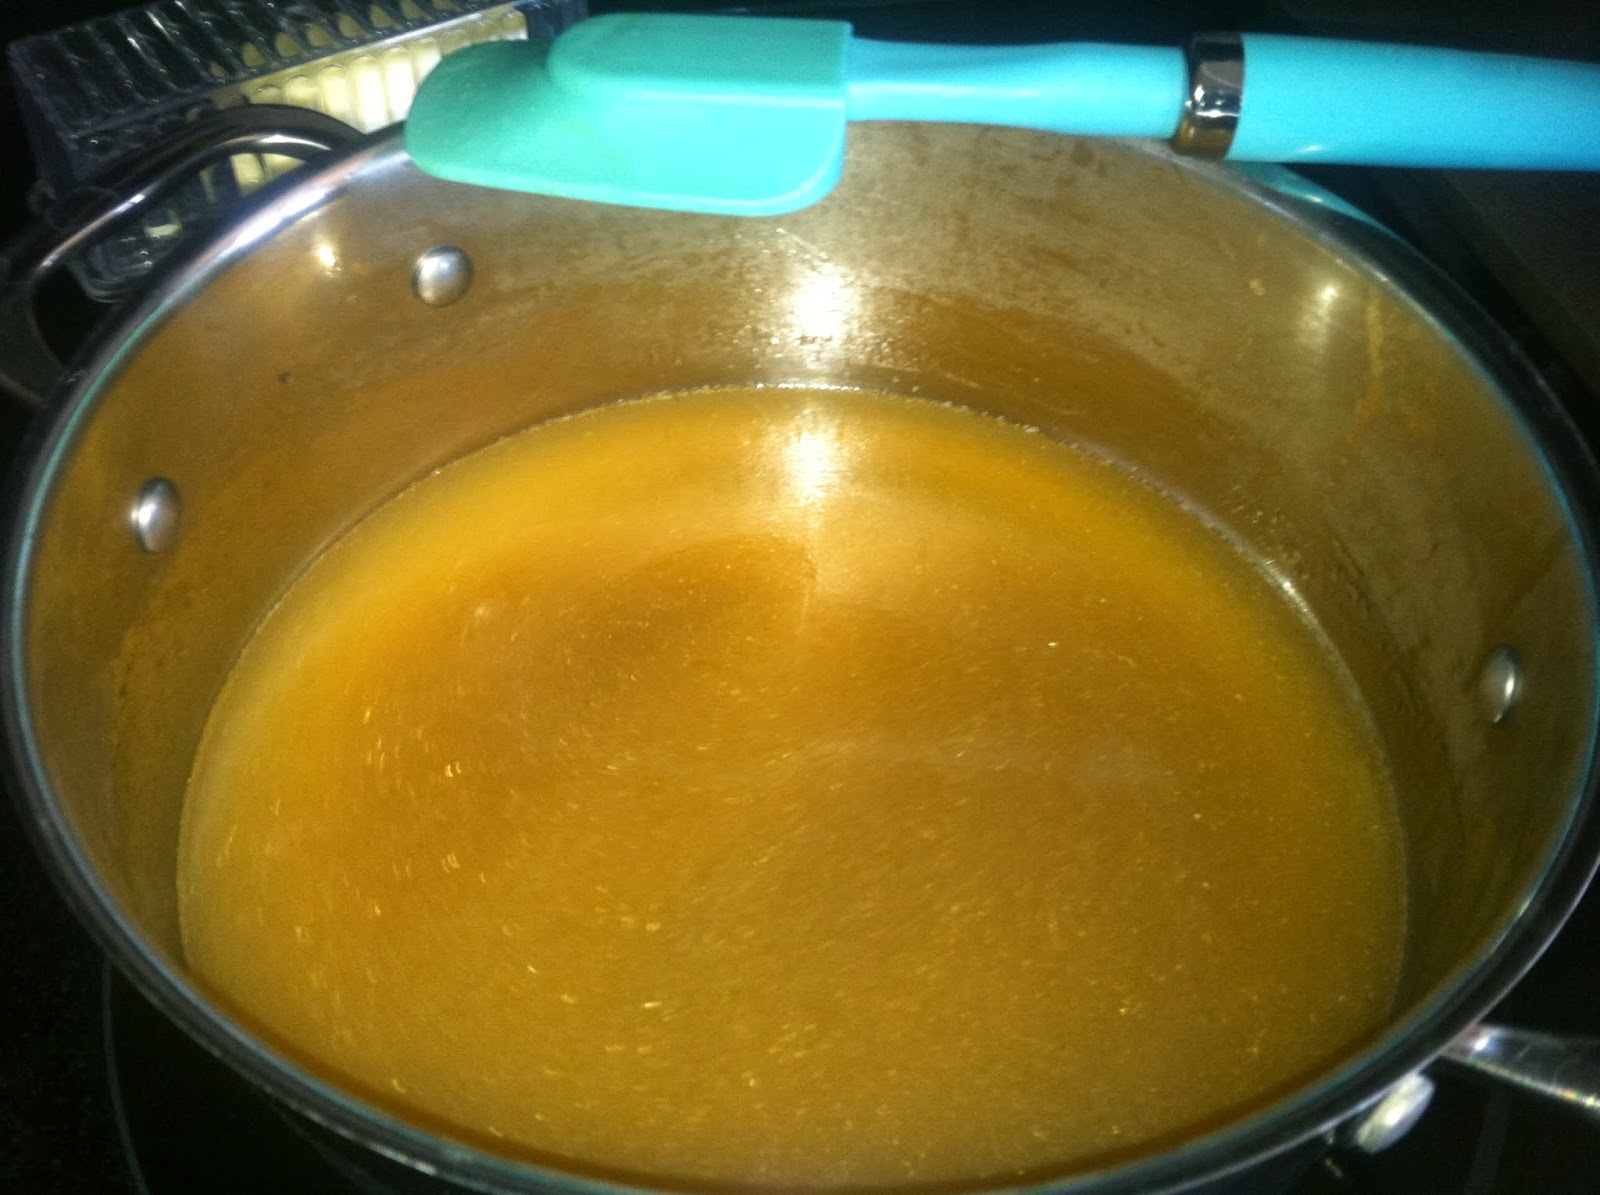
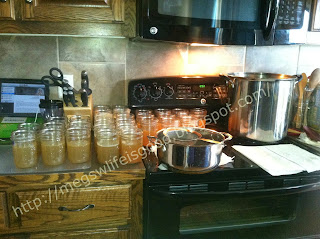
  • Start the broth on a simmer for cooking the liver. Here is my simmering broth:
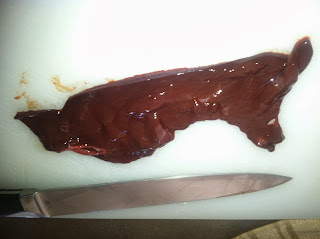
  • I slice the beef liver into strips and then cut it into about 1″ pieces so it cooks quickly.
  • Next, I add the organic, grassfed beef liver to the broth. I Simmer for a few minutes, or until it is no longer pink.
I know, it’s raw liver. That is pure, nutritious gold right there, y’all!
  • After it is cooked, I spoon out the liver and placed into the food processor. Then pour some of the liquid into the food processor with the liver. Puree it until it is liquefied (this will take some time- you’re liquefying a meat, so be patient! You need as much of the meat as you can get in the formula). *Be careful to let it cool some or you will have exploding beef liver juice flying all over your kitchen. Ask me how I know … Depending on how old your food processor is, you may need to upgrade to the Best Food Processor to ensure that you end up with a smooth paste. Outdated processors are great for chunky recipes and breadcrumbs, but with this recipe, you need a processor that will give you an even consistency.
  • Strain the liquefied liver through a mesh strainer into a bowl with the rest of the broth. **Liver has an entire strip of some kind gristle running through it. You need to strain this out, which is why I run mine through a strainer. The gristle DOES NOT liquefy. I have read other tutorials that fail to mention that … and then I wondered why it wouldn’t go through the nipple of Mister’s bottle. You must strain out the gristle. Okay. Got it? Strain the gristle….
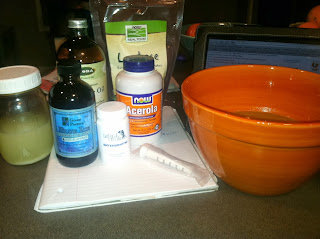
My liver infused broth in a bowl, with some of my ingredients
  • Then I add in the amount of each ingredient the recipe calls for, and whisk it very well. I add the powdered ingredients first, so they can dissolve while it is warm. Then pour it into jars, using a wide mouth funnel for ease of filling the jars.
**Tips**
  • One batch makes about 36 ounces, which at 8 months was enough for one day for my son. I made this in triple and quadruple batches, so I didn’t have to make it every day. My understanding is it will last 5 days in the fridge just fine. Ours certainly did. Do what you think is best.
  • Shake it well before pouring each time. The fats (olive oil, coconut oil, and cod liver oil) in the formula will separate when chilled in the fridge, so shake, shake, shake. But be sure the lid is on nice and tight, or you will have a huge mess of beef liver baby formula all over your kitchen. Ask me how I know..

There you have it, how we make the homemade baby formula from Weston A Price and Nourishing Traditions.

This post may contain affiliate links.

Perfect Hobbies for Kids

When young children adopt new hobbies, they discover all sorts of new skills and learn some important life lessons. Through hobbies, children can find what lights them up and excites them at a young age, as opposed to doing it later on when they feel it’s ‘too late’ to do anything about it.

My husband and I are both huge hobby lovers- crafting, journaling, sewing, embroidery, painting, woodworking, gardening, leather work, and animal husbandry … the list goes on! We have enjoy distilling a love for handicrafts and hobbies in our children, and watching them grow in their skills.

Here are just a few hobbies children of all ages could test out!

hobbies for kids

Pexels – CC0 License

Reading And Writing

Reading to children is essential for language social, emotional, and cognitive development.  Reading aloud to children will improve their listening and speaking skills, and they might even become good writers themselves, as it can help them to develop their own imagination. Once children have learned to read on their own, cultivating a love for reading is one of out biggest jobs! A child that loves to read loves to learn, and from there they will grow into unstoppable, teachable, curious adults. Loving to write often comes when a child enjoys reading, because they are driven to write their own stories.

Visiting Places of Interest

Traveling to visit a historical site, a history or pop up museum, a well loved author’s home, and other sites of interest can be a brilliant hobby for a child. As well as having fun and exploring, they will learn plenty from immersing themselves in culture. It gives them a base to build plenty of other hobbies on – writing, crafts, and reading, for example. Anything you can study in science, history, art and literature can be turned into a field trip, or family road trip. There is so much to experience no matter what your child loves to learn about-get out there and explore!

Building and Engineering

Children love to build- what they can build and create with blocks, legos, and Magnatiles is endless. From model bridges and giant towers, to cars and boats, they can have an incredible amount of fun building just about anything that takes their fancy.  Expand their possibilities by providing a child-friendly tool kit which allows them to build whatever they like-a small hammer, screw drivers, age appropriate nails, nuts, bolts, washers, screws, zip-ties, etc can be kept in an old tool box near some scrap wood, so kids can easily create!

Painting

Painting is an excellent way for children to learn to express themselves. Open ended art-meaning, no defined assignment, no rules- allows for the most creativity. If they paint the sky green, let them have a green sky. This again goes back to helping them develop their imaginations and having confidence in their abilities. You never know – you may have the next Picasso in your family! =)

Gardening

Gardening not only helps children develop an interest in nature and stay active, but it also strengthens their immune systems. Why not give them their small plot of garden to play with and grow things? You could let them grow things inside the house if space is at a premium. A plot of land, or a potted plant, either way we are cultivating a sense of responsibility and nurturing in our kids!

Cooking & Handicrafts

Cooking is an essential skill for anybody to learn – after all, everybody needs to eat! Let them cook with you from a young age, and maybe start letting them use cooking kits when they are old enough. Children of all ages can help in the kitchen-prepping oatmeal, mixing, stirring, browning meat, poor liquids, measuring ingredients. Get them involved and enjoy your time together!

hobbies for kids

Handicrafts are anything children can do with their hands- sewing, knitting, crocheting, whittling, calligraphy, cross stitching, dyeing yard, quilting, bead work, wood working, pottery, mosaics the list goes on and on and on. We do handicrafts while listening to audiobooks, while I read aloud, or while watching an art video.

Let your children find a hobby that they enjoy and you’ll notice a vast difference in their confidence. Starting them off while they are young gives kids the chance to know what excites them and can help them find their passion in life later! Most any hobby requires a skill, and those skills can mean enjoyable work later in life.

Disclaimer: Some links on this blog are affiliate links; when you use those links you help support my family, at no additional cost to you.  Thank you!

Easy Dairy Free Quinoa Breakfast Mash

Easy Dairy Free Quinoa Breakfast Mash

We have been in a breakfast rut for a few months now. We have tried so many breakfast recipes for oats and quinoa, and my kids haven’t liked any of them.  Today I mashed together a few different ideas and came up with something they did like.  Well- my daughters liked … my son still prefers oatmeal and an egg sandwich.  *sigh*

The struggle of feeding 4 children real, nutritious food is real, y’all.

This makes about 4+ servings, depending on how much your children eat.  This would last us about 2 days in our house, with 2 of 4 kids eating a bowl.

Quinoa Breakfast Mash

20 minutes

See Detailed Nutrition Info on

Quinoa Breakfast Mash

Ingredients

  • 2 cans coconut milk
  • 2 cups uncooked quinoa
  • 4-8 TB of Pure Grade B Maple Syrup
  • 1 cup water
  • salt to taste
  • your choice of topping- dried coconut, craisins, raisins, sliced banana, etc

Instructions

  1. Add all ingredients (exclude toppings) to a pot
  2. Bring to a boil
  3. partially cover and turn down to a simmer until most of the liquid is absorbed, about 15 minutes
  4. Serve with dried coconut sprinkled on top

This recipe is prepared dairy free, but I imagine it would be even more delicious with a pat of butter on top. =)

Disclaimer: Some links on this blog are affiliate links; when you use those links you help support my family, at no additional cost to you.  Thank you!

Applesauce Teriyaki Pork Loin {a favorite}

I am always looking for new recipes to add as staples into our recipe circulation.  I had a pork loin in the freezer (actually, a 2-pack) and wanted to cook it for dinner, but wanted something different than our normal pork loin.  I found a recipe for applesauce pork loin, and tweaked it a bit for our tastes (read: added flavor!)

Applesauce Teriyaki Pork Loin

Applesauce Teriyaki Pork Loin {a favorite}

1 hour, 30 minutes

Number of servings: 6

See Detailed Nutrition Info on

Ingredients

  • 1 boneless pork loin roast 2-3 pounds, or 2 small pork loins
  • pink salt to taste
  • black pepper to taste
  • 2 tablespoons (expeller pressed) coconut oil or olive oil
  • 1 cup applesauce
  • 3 tablespoons Dijon mustard
  • 1 tablespoon honey
  • 1-2 tablespoons of Teriyaki sauce
  • 2 cloves of garlic, minced

Instructions

  1. salt and pepper each side of pork loin to taste (I am generous here)
  2. brown each side in oil using large skillet, over medium heat
  3. mix all other ingredients in a bowl
  4. place pork loin(s) in a baking dish, or on roast pan
  5. using spoon, ladle applesauce mixture over pork loin(s)
  6. **note** I reserve some applesauce mixture to glaze the pork after it comes out of the oven. You don't have to do this.

I usually serve this with mashed potatoes and salad, or roasted veggies and salad.  My family devours it!  As a matter of fact … it was so delicious I forgot to take an “after” photo before they ate it all, so I had to use a stock photo.  (sorry about that)

I would love to hear your favorite pork recipe, tell me about it in the comments!

Disclaimer: Some links on this blog are affiliate links; when you use those links you help support my family, at no additional cost to you.  Thank you!

Dairy Free, Real Food Vanilla Cupcakes and Chocolate Frosting

I always find myself trying to convert recipes for our family’s health needs- real food ingredients and dairy free- for special occasions.  So, I wanted to share a new favorite recipe for yellow cake cupcakes with chocolate frosting!

A few tips: To make a real food powdered sugar, just grind your sucanat in a blender or food processor to a powdered consistency.  You can of course use regular powdered sugar, it is up to you!  I prefer real, pink salt but use what you have on hand.

Also, expeller pressed coconut oil will have NO coconut flavor, that is the kind we prefer in our family.   (coconut flavored eggs in the morning are not popular here!  haha)

Looking for a chocolate cake recipe?  See my post HERE

Dairy Free, Real Food Vanilla Cupcakes and Chocolate Frosting (gluten free options)

See Detailed Nutrition Info on

Dairy Free, Real Food Vanilla Cupcakes and Chocolate Frosting (gluten free options)

Ingredients

  • 1 1/2 cups whole wheat or all-purpose flour (I like to do about 3/4 freshly ground whole wheat and 1/4 all purpose flour)
  • 1 1/4 teaspoons aluminum free baking powder
  • 1/4 teaspoon pink himalayan salt
  • 1/2 c expeller pressed coconut oil
  • 1 cup sucanat
  • 2 large eggs, at room temperature
  • 2 teaspoons vanilla extract
  • 2/3 cup rice, almond, or coconut milk, at room temperature
  • Frosting
  • NOTES: if you are gluten free as we are now, using a gluten free mix will work well here. I like to do 3/4c gluten free flour, and 1.4c almond flour)

Instructions

  1. Preheat the oven to 350
  2. Line a 12-cup muffin pan with paper liners, or spray with nonstick spray.
  3. Whisk the flour, baking powder and salt in a bowl
  4. Beat the coconut oil and sucanat in a mixer using the paddle attachment on medium-high speed until fluffy, about 4 minutes
  5. Beat in the eggs, one at a time, scraping down the bowl as needed
  6. Beat in the vanilla
  7. Reduce the mixer speed to medium low; beat in half of the flour mixture, then all of the milk, then the remaining flour mixture until combined.
  8. Pour batter into the muffin cups, filling about half full
  9. Bake until a toothpick inserted into the center of a cupcake comes out clean, 15-18 minutes
  10. Let cool and top with frosting!

For the Dairy Free Frosting:

  • 1/4 c coconut oil
  • 1/3 c rice, coconut, or almond milk
  • 1 tsp vanilla extract
  • 3/4 c cocoa powder
  • 3 1/2 c powdered sugar

Frosting Directions:

  • In a large bowl beat coconut oil and cocoa together until combined
  • Add milk and vanilla; beat until smooth.
  • Gradually beat in powdered sugar until desired consistency is achieved.
  • Adjust with more milk or powdered sugar if necessary for right consistency.

Disclaimer: Some links on this blog are affiliate links; when you use those links you help support my family, at no additional cost to you.  Thank you!

{Instant Pot} Quick and Easy Potato Salad Recipe

Summer is quickly approaching- and oldie but a goodie

—-originally posted May 2018—-

Today, for the Menu Monday Linky, I want to share a wonderful recipe for potato salad.  I just sorta threw it together one day.  I know, it’s hard to mess up potato salad, but this really good.  It also makes a lot.  So you can have it for one meal, and probably have enough for a lunch or two during the week, depending on how many people you are feeding.

homemade potato salad

I don’t have a picture of the final product!  I know.  But trust me, it is beautiful and creamy.


For an Instant Pot version of cooking the potatoes:

  • peel and chop poctatoes into quarter or halves
  • place 1 cup water in instant pot
  • insert steamer basket/rack
  • add potatoes and salt
  • close lid, adjust valve to closed and press Manual, high pressure, 4 minutes
  • **NOTE- you can add eggs to the instant pot and cook with the potatoes if you like eggs in your potato salad. They will cook perfectly!

Potato Salad

See Detailed Nutrition Info on

Ingredients

  • 3-4 lbs of red potatoes
  • 1/3 c mayonaise (homemade or store bought) more to taste
  • 2-4 tbsp mustard, more to taste
  • 1/2 c sweet pickle relish, more to taste
  • 4 hard boiled eggs, chopped (optional-we prefer it without these days)
  • 1 clove of garlic (trust me!), minced
  • 1/4 red onion, chopped (I can no longer eat raw onion, thank you last pregnancy ... but most enjoy it!)
  • 1-2 tssp paprika, sprinkled in
  • real (pink) salt and pepper to taste

Instructions

  1. Wash and halve red potatoes (if you like them peeled, peel here)
  2. Cover potatoes with water, covering with about 1" of water
  3. bring potatoes to a boil for about 10 minutes
  4. *the secret to perfect potato salad is the potatoes! You do not want mushy 'taters! when you can stick a fork in and they are still firm but no longer solid, take them off the heat
  5. Drain potatoes
  6. Spread potatoes out on a cookie sheet to cool
  7. After they have cooled, dice
  8. Place in large mixing bowl
  9. Add salt and pepper to taste
  10. Then add remaining ingredients

Notes

This is a super easy recipe, and our absolute favorite side item for stuff like the Super Bowl. We had it last night, and it was wonderful!


Enjoy!

Traditional Foods: Making Milk Kefir with a Video (or two …)

This is a repost from 2013. We are still making kefir, using our goat milk and love our kefir cheese!

I wanted to explain how easy it is to make Kefir.  I read and read about doing it, but having a friend actually show me in her kitchen made it much less intimidating.

Kefir is like a tangy, drinkable yogurt.  It’s a probiotic, naturally cultured, enzyme containing yogurt-like dairy product that is amazing for smoothies, in place of yogurt for snack, can be used for soaking grains, and the list goes on.  You can also use it to get whey.

Did I mention it is delicious?  Especially with a little
Organic Sucanatand fruit on top?  =)

Lexie’s first time trying kefir- she LOVED it!

First, what you need to make kefir is some milk kefir grains

Kefir grains look like little cauliflower or tapioca grains, that turn milk into kefir!
You can have a wonderful friend give you some (because they multiply ….) or you can buy some dried kefir grains from Cultures for Health.  There are also some sold on Amazon
For about 2 teaspoons of grains, I use about 16 oz of milk.  We use raw milk from a local farm (raw milk is healthier and can actually aid in healing the gut because all the beneficial enzymes and bacteria have not been killed off via pasteurization), but any milk will work. (2019 update- we use our fresh, raw goat milk now.)
(Passionate Homemaking has a recipe for COCONUT MILK KEFIR!  I am so excited, because now I can make kefir for my little dairy allergy-havin’ Mister!  Yay)
OK, back to milk kefir.  There are two types of kefir grains: dairy and water.  Be sure you get dairy for the yogurt-like kefir.  (I want to try water kefir grains next!  But that comes after I master sourdough bread!)

So, you need:

  • milk
  • a jar
  • a coffee filter
  • a rubber band
  • kefir grains

1) Put your kefir grains in the jar

2) add the 2 cups or so of milk.

3). Cover with the coffee filter, secured by the rubber band, and let it sit for about 24 hours (24-36 hours is average. (the purpose of the filter is to keep bugs, namely fruit flies, out but still allow the fermentation process the air it needs.)

Leave the jar sitting on the counter to do its thing- try not to have it near fruit or other foods you have that are fermenting. You can also put it on top of the fridge or something, but I would forget it up there ….

The longer you leave it after 24 hours, the tangier and fizzier it becomes!  FUN!  And, if ever you leave it too long (which I have done) you just sorta scrape off the top layer of really thick stuff, and continue on like normal.


You can sorta see the whey starting to form “pockets” in there … that’s how you know it’s working!  Sometimes it will start at the top, other times at the bottom .. the grains sorta have a mind of their own.  =)
4) After 24 or so hours, simply pour the kefir into a plastic mesh strainer
over a bowl, so you can separate out the grains.5) When you are done, you will have your little grains in the strainer, and in the bowl you will have kefir!  Put your kefir in a jar and place in the fridge, or go ahead and use it.
6) Lastly, I take the grains and put them in a jar, add a little bit of the kefir I just made (this gets the good bacteria back in there and “boosts” the batch), and then pour in about 2 cups of milk, cover and do it all over again!

We like our kefir in smoothies, as a drinkable yogurt, and as “frozen treats,” (aka smoothie’s frozen into popsicle forms).  You can also flavor kefir in a second fermentation (like you would kombucha tea).  Learn more about that here: http://www.culturesforhealth.com/second-fermentation-milk-kefir

After they get acclimated to your milk (yes, I did just say that) they will do a great job turning the milk into kefir.

So, people joke about kefir grains being like pets … and they kinda are.

You have to keep them alive….  BUT HAVE NO FEAR!  They are so easy to keep alive.

If ever you want to take a break from making kefir, just put them in a jar or bowl, in the fridge and feed them milk every few days or so.  They need the sugars from the milk to stay alive.

They are a live organism, after all …
But with that kefir you can also make cream cheese and whey!  That post is coming soon!

Here is a 6 minute video (how embarrassing  …) on how I make kefir!


Elderberries {wordless Wednesday}

It is almost fall, and August here is telling us it doesn’t want to wait. Here is hoping the cool weather is here to stay!

We have been enjoying so much outside time, which has included picking and eating elderberries from our bushes planted this spring.

Elderberries


Disclaimer: Some links on this blog are affiliate links; when you use those links you help support my family, at no additional cost to you.  Thank you!

First Steers on the Farm Go to Processing {a grateful feflection}

We have spent the last 2 years raising, loving, and caring for our big ole’ “baby cows.”

These ornery boys have been so much fun to learn the ropes of raising cattle on our little farm. They left with scratches, kisses, and lots of loves as they headed off to freezer camp this weekend.

When I think about the fretting, the tears, and the love that went into raising them from bottle babies- the 5am early mornings, the evening bottle feeds in the snow, the escaping every. single. time. my husband was traveling, I can’t help but feel sad, and thankful.

They gave me cold morning walks under the stars with my husband, at a time when we were both still homesteading-babies, learning so much (still are …), excited, and nervous.

They taught us about the first hard loss of an animal you try so hard to save (there were once 3 big ole cow babies).

They gave us endless laughter as the ran and played in the pastures as calves, and heart attacks every time they came rumbling up for scratches after they were 1500lb pounds.

They gave us something to do each day, something to look forward to (our first home raised, grass-fed beef), and something to look back on.

We gave them a lot of love, a lot of garden tomatoes, a lot of good hay, a lot of time. In return they will continue to give by feeding our young family.

After taking them to the processor yesterday, we prayed for them at our family meal last night.

I didn’t cry, but I am now.

Not because they are gone, but because when I think about all we went through with them, what we learned,  the friendships that grew just from their escaping (howdy neighbors!), the time my husband and I had together while caring for them, our kids learning about real life from these 2 huge animals while watching them grow…

I am just grateful.

First Steers on the Farm {a Grateful Reflection}

munching on sweet cubes after getting some scratches before heading off


Disclaimer: Some links on this blog are affiliate links; when you use those links you help support my family, at no additional cost to you.  Thank you!

error: Content is protected !!
Verified by MonsterInsights